Shooting Star Appliqué
By Connie Stieler
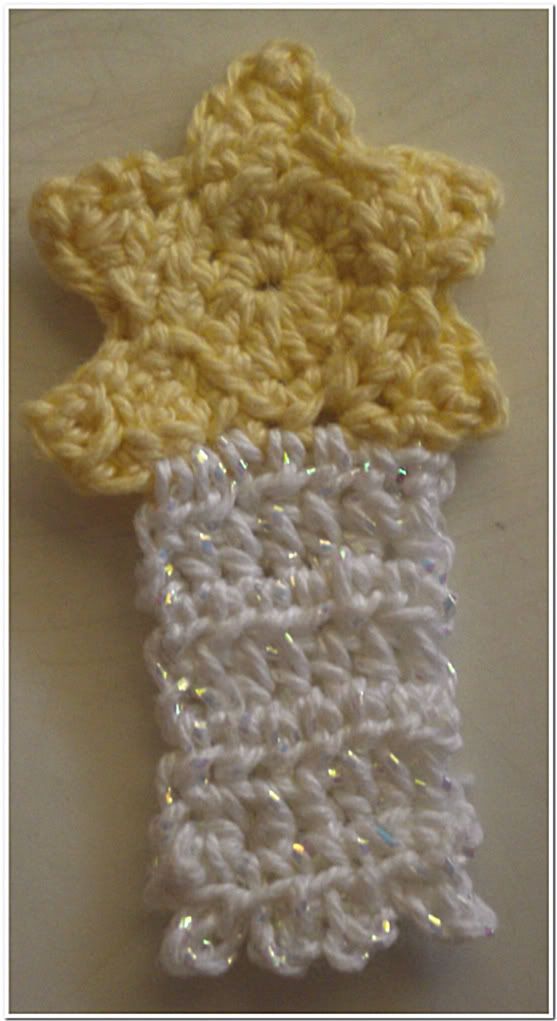
Materials
Size 10 cotton thread
yellow/glittery white - or whatever you like
Size 7 steel hook
With yellow make magic ring.
R1) 10 hdc in ring. Pull tail to close ring. Ch 1, turn
R2) ( 2 hdc in next st, hdc in next st) around. Sl st to top of beg hdc, ch 1, turn. (15 st)
R3) Hdc in next 3 st. Leave remaining st unworked. Ch 1, turn.
R4) Hdc2tog, hdc in next st. Ch 1, turn.
R5) Hdc2tog, ch1, sl st down side of triangle, back to where triangle meets the circle, sl st here. Begin next triangle in next hdc. Rep from R3 until there are 5 points on star. After sl st down the last triangle, FO.
Attach glittery white 1 st next to your previous FO towards the point of the 1st triangle.
R1) Ch 2 (counts as hdc now and throughout), hdc in next 6 spaces. Ch 2, turn. (7 hdc)
R2) Hdc across row.
R3-7) Rep previous row. At end of row 7, ch 1, turn.
R8) *Sc in next st, ch 3, sl st through top of last sc made*. Picot made. Continue this across the row, ending with sc. 4 picots made. FO.
If you have any problems or questions, please feel free to email me or leave a comment. Happy Hooking!
I think this would make a cool bookmark too. On the glittery white part instead of stopping at Rnd 7 you can keep repeating Rnd 2 until it is about bookmark length and then do Rnd 8. Thanks so much for sharing your pattern.
ReplyDeleteIt is very neat and a great idea. :)
Thanks! I'm glad you enjoy it, I really like your idea of creating a bookmark with it too. I might just have to make one now :o)
ReplyDelete