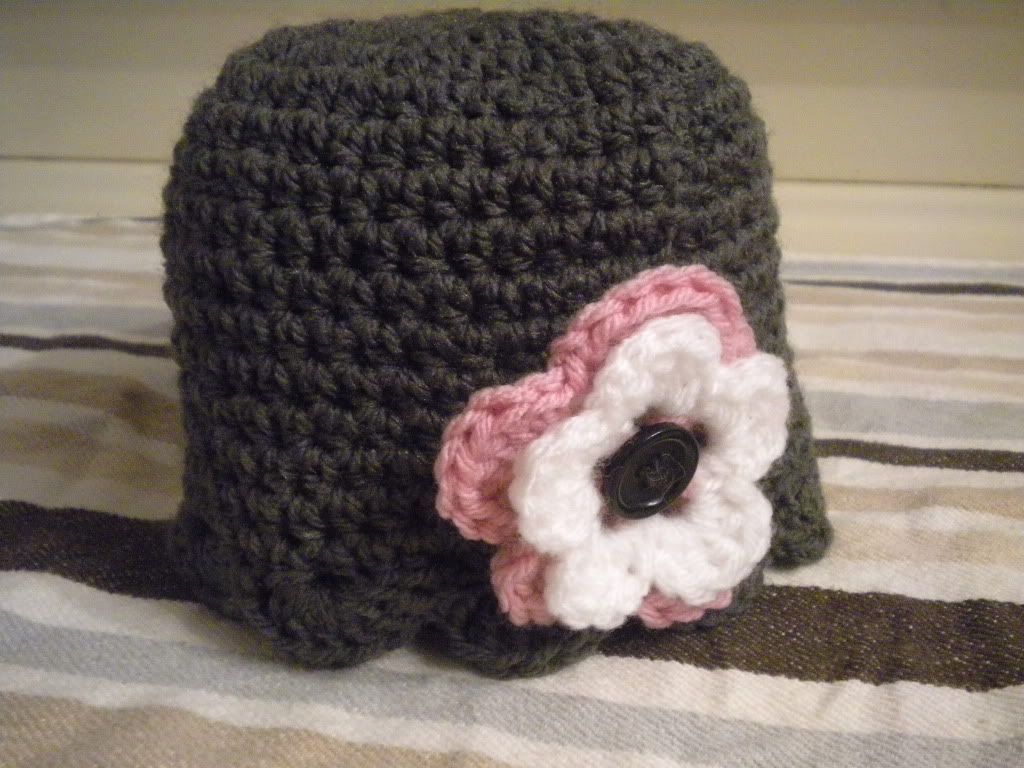
Button-Flower Beanie
by Connie Stieler
This pattern is copyrighted, please do not sell my pattern or claim as your own. Please do not post this pattern on another website/blog or other types of media without permission. Feel free to post a link to this page. For personal use only. Thank you for respecting this copyright.
Size:
6-9 months
Materials:
(Hat)
5.00 mm/H/hook
approximately 2.5-3 oz worsted weight yarn
(Button-Flower)
3/4" button
small amount worsted weight yarn in desired colours
Note: Ch 2 counts as 1st hdc of round. Join rounds with sl st unless otherwise stated.
Beginning with hat;
R1) Ch 3, 9 hdc in 3rd ch from hook, join to 1st hdc (10 hdc)
R2) Ch 2, hdc in same sp as ch 2, 2 hdc in each st around.(20 hdc)
R3) Ch 2, hdc in same sp as ch 2, (hdc in next st, 2 hdc in next st) around. (30 hdc)
R4) Ch 2, hdc in same sp as ch 2, (hdc in next 2 st, 2 hdc in next st) around. (40 hdc)
R5) Ch 2, hdc in same sp as ch 2, (hdc in next 3 st, 2 hdc in next st) around. (50 hdc)
R6-15) Ch 2, hdc in each st around.
R16) Ch 1, sc in same sp. Skip 1 st, 6dc in next st. (Skip 1 st, sc in next st, skip 1 st, 6 dc in next st)around. Finish off and weave in ends

*** If you want a larger hat, continue increasing after R5 by hdc in next 4 st, 2 hdc in next st, and so on until desired size. If you want a smaller hat, stop increasing after you have reached the desired size in R3-5.***
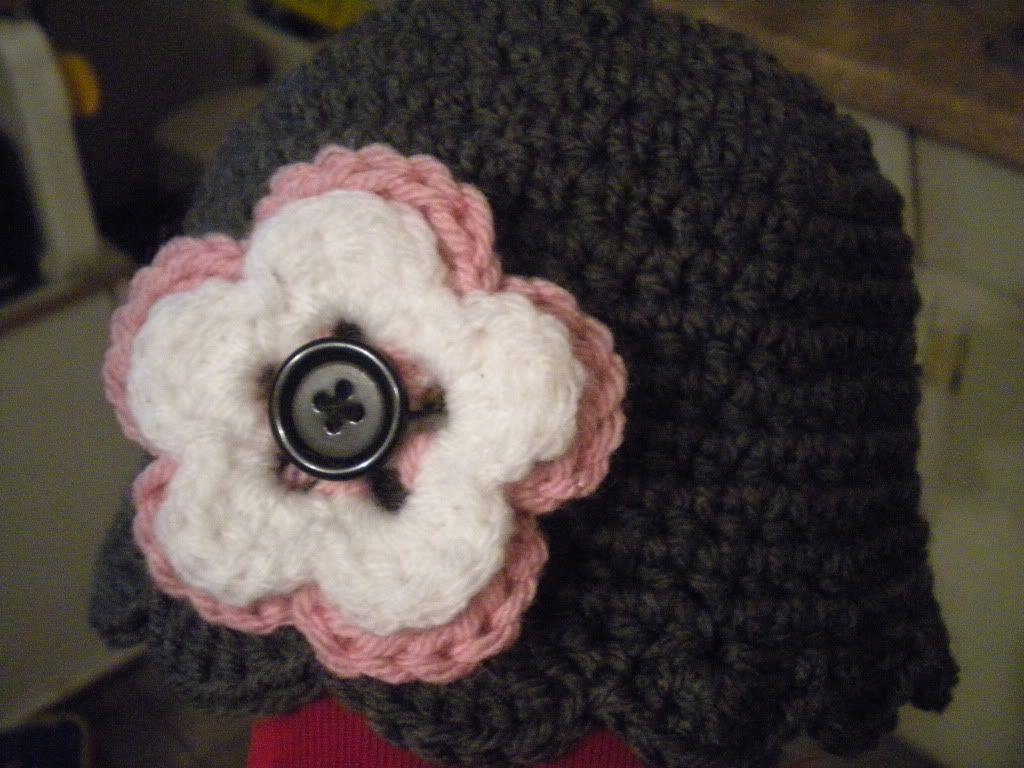
Button-Flower
Join rounds with sl st
Using desired center colour,
R1) Ch 4, join to form ring, (sc, ch 3, sc) 5 times.
R2) (Sc, ch 1, 3 dc, ch 1, sc) in each loop.
R3) Switching colours and working behind first row of petals, (sc around the 'spoke' or base of petal, ch 4) rep around.
R4) (Sc, ch 1, 5 dc, ch 1, sc) around. Fasten off after joining to first st.
Sew button to center of flower using coordinating colour, then sew flower to hat. I attached my flower to the beginning of rows 12 and 13, this hides your seam nicely!
Congratulations on your first original hat pattern. This hat is just lovely, Connie. The color combination is wonderful and you did a terrific job with the stitching. And the button is the perfect touch. Very nice!
ReplyDeleteI have been looking for a hat I can make with a button on it! I don't know what my fascination is with buttons, but this is the first one I found that I liked. I will probably do different colors, but I am definitely going to try it out. :) Thanks for sharing.
ReplyDeleteHey! Just wanted to thank you for such a fabulous pattern. I've just completed it and it's absolutely gorgeous!
ReplyDeleteWOW great pattern I enjoyed doing this. I am just starting to teach myself to crochet and this was a great pattern to start with. All i need to do is work out how I can make it 1 size smaller and 1 size bigger so it fits all of my grand daughters.
ReplyDeleteWendy
I just made the flower to go on a 'bucket' (as my daughter says) and I love it! Thank you!
ReplyDeletehttp://wp.me/pK2DW-rn
This is such a cute beanie!!!! My girls looked so cute in it!! But I found it to fite more as a 3-6 months.
ReplyDeleteI keep getting a pancake, I am using the right size needle. I am trying to make it a bigger size, but cannot figure out why it is not working...
ReplyDeleteI mean Hook of corse! ;)
ReplyDeleteHi Jancie, sorry to hear that you're having some difficulty with the pattern. What size are you trying to make, I would be happy to work with you to figure this out!
ReplyDelete